Rocket.chat
https://shoutrrr.nickfedor.com/services/chat/rocketchat/
URL Format
rocketchat://[username@]rocketchat-host/token[/channel|@recipient]
URL Fields
UserName - Override webhook user
Default: empty
URL part:rocketchat://username@host:port/token/channelHost - Rocket.chat server host (Required)
URL part:rocketchat://username@host:port/token/channelPort - Rocket.chat server port (Required)
URL part:rocketchat://username@host:port/token/channelTokenA - Rocket.chat server token (Required)
URL part:rocketchat://username@host:port/tokenA/tokenB/channelTokenB - Rocket.chat server token (Required)
URL part:rocketchat://username@host:port/tokenA/tokenB/channelChannel - Rocket.chat channel (Required)
URL part:rocketchat://username@host:port/tokenA/tokenB/channel
Creating a Webhook in Rocket.chat
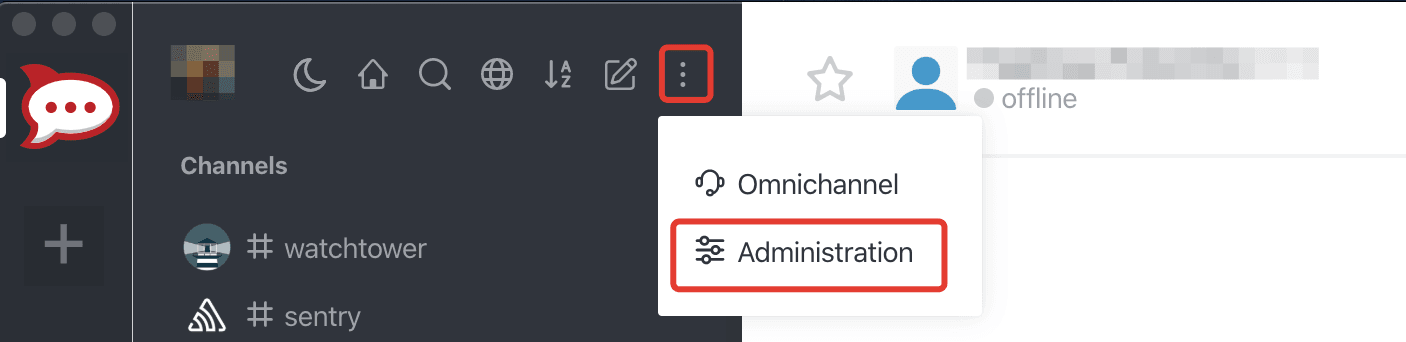
- Open up the chat Administration by clicking on Administration menu
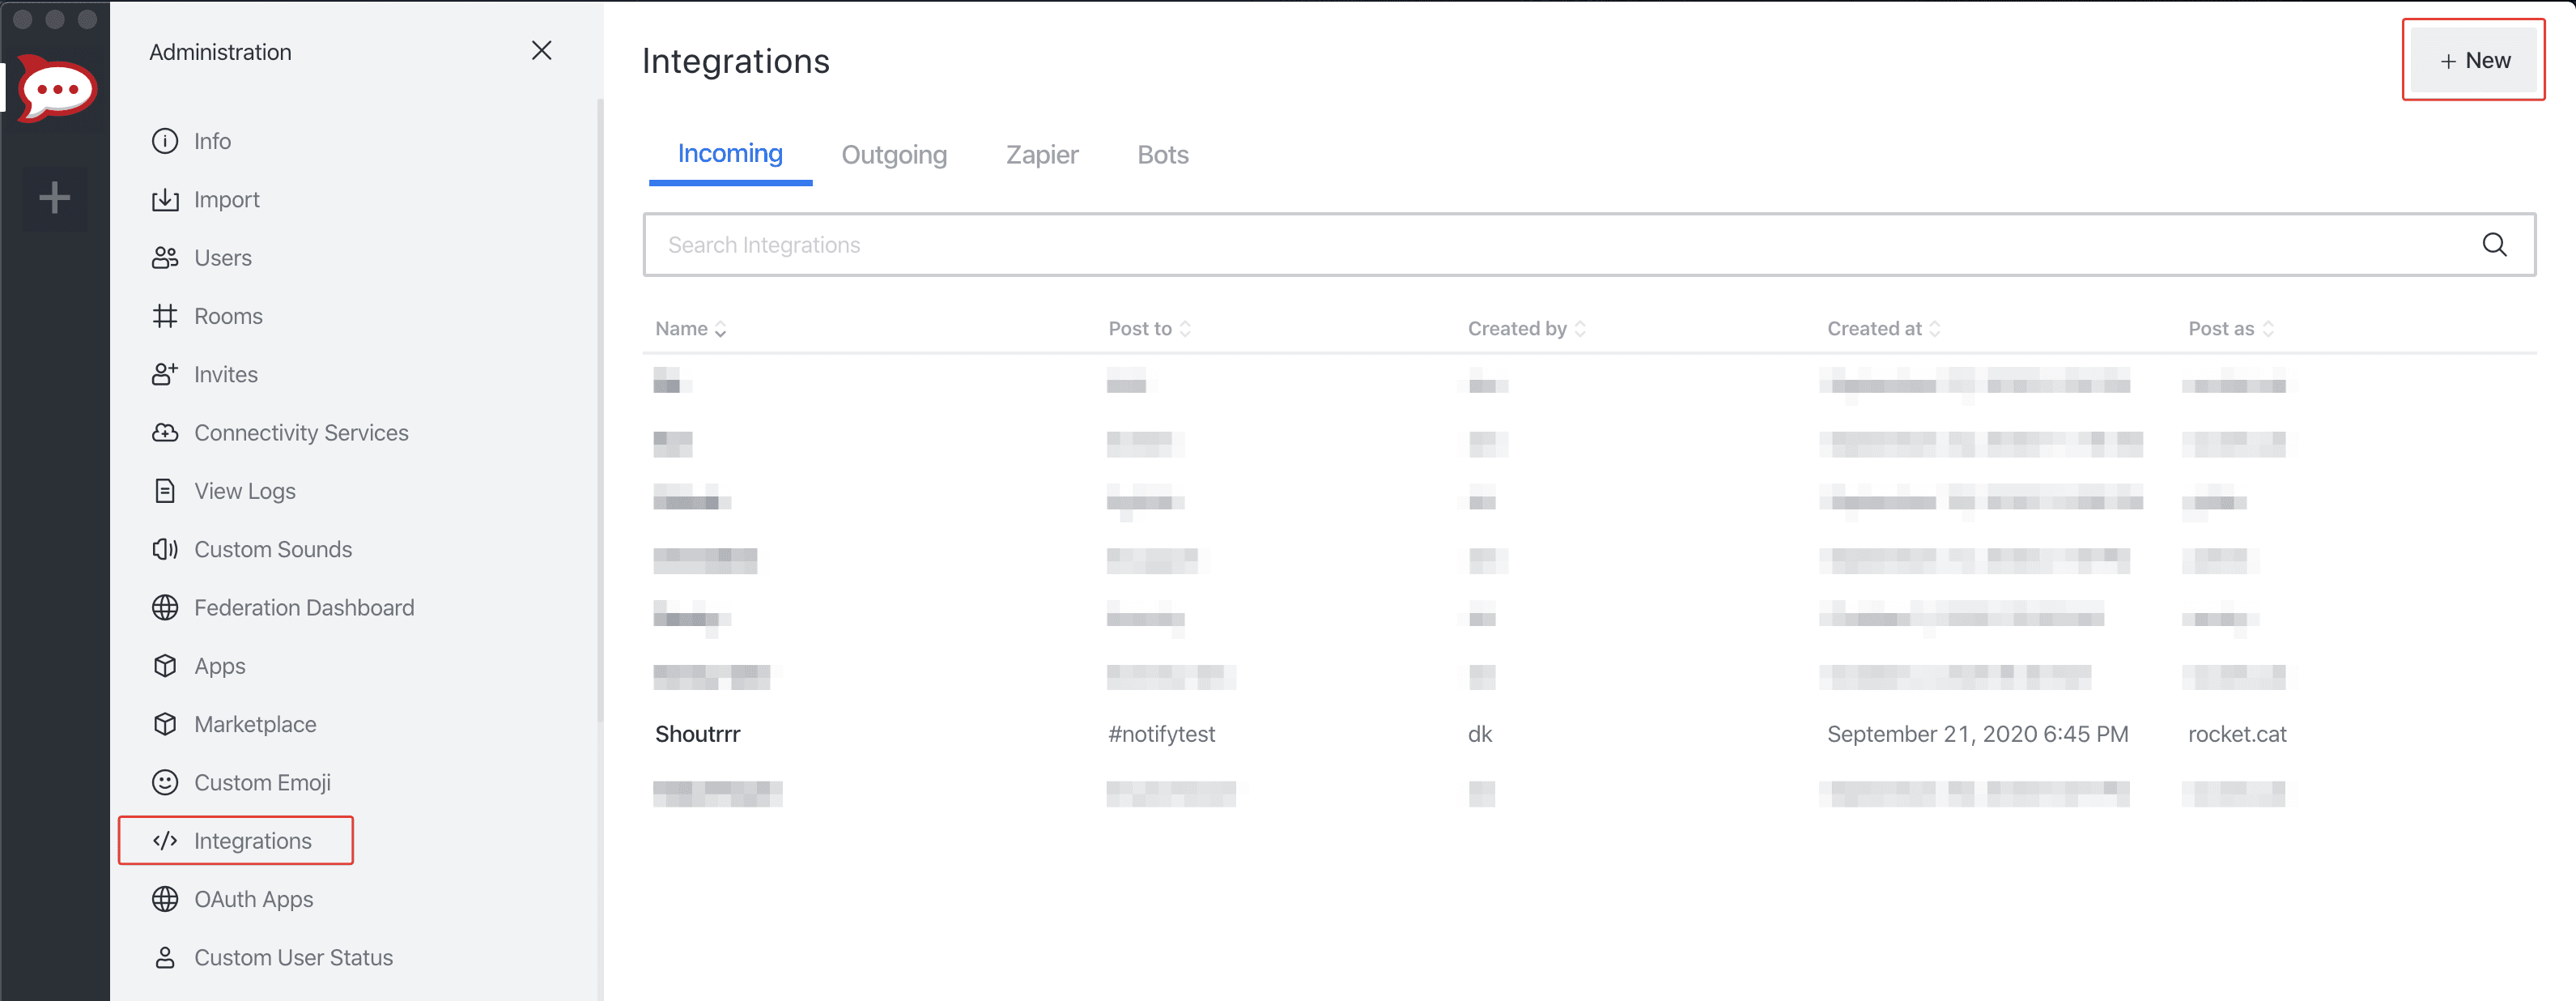
- Open Integrations and then click New
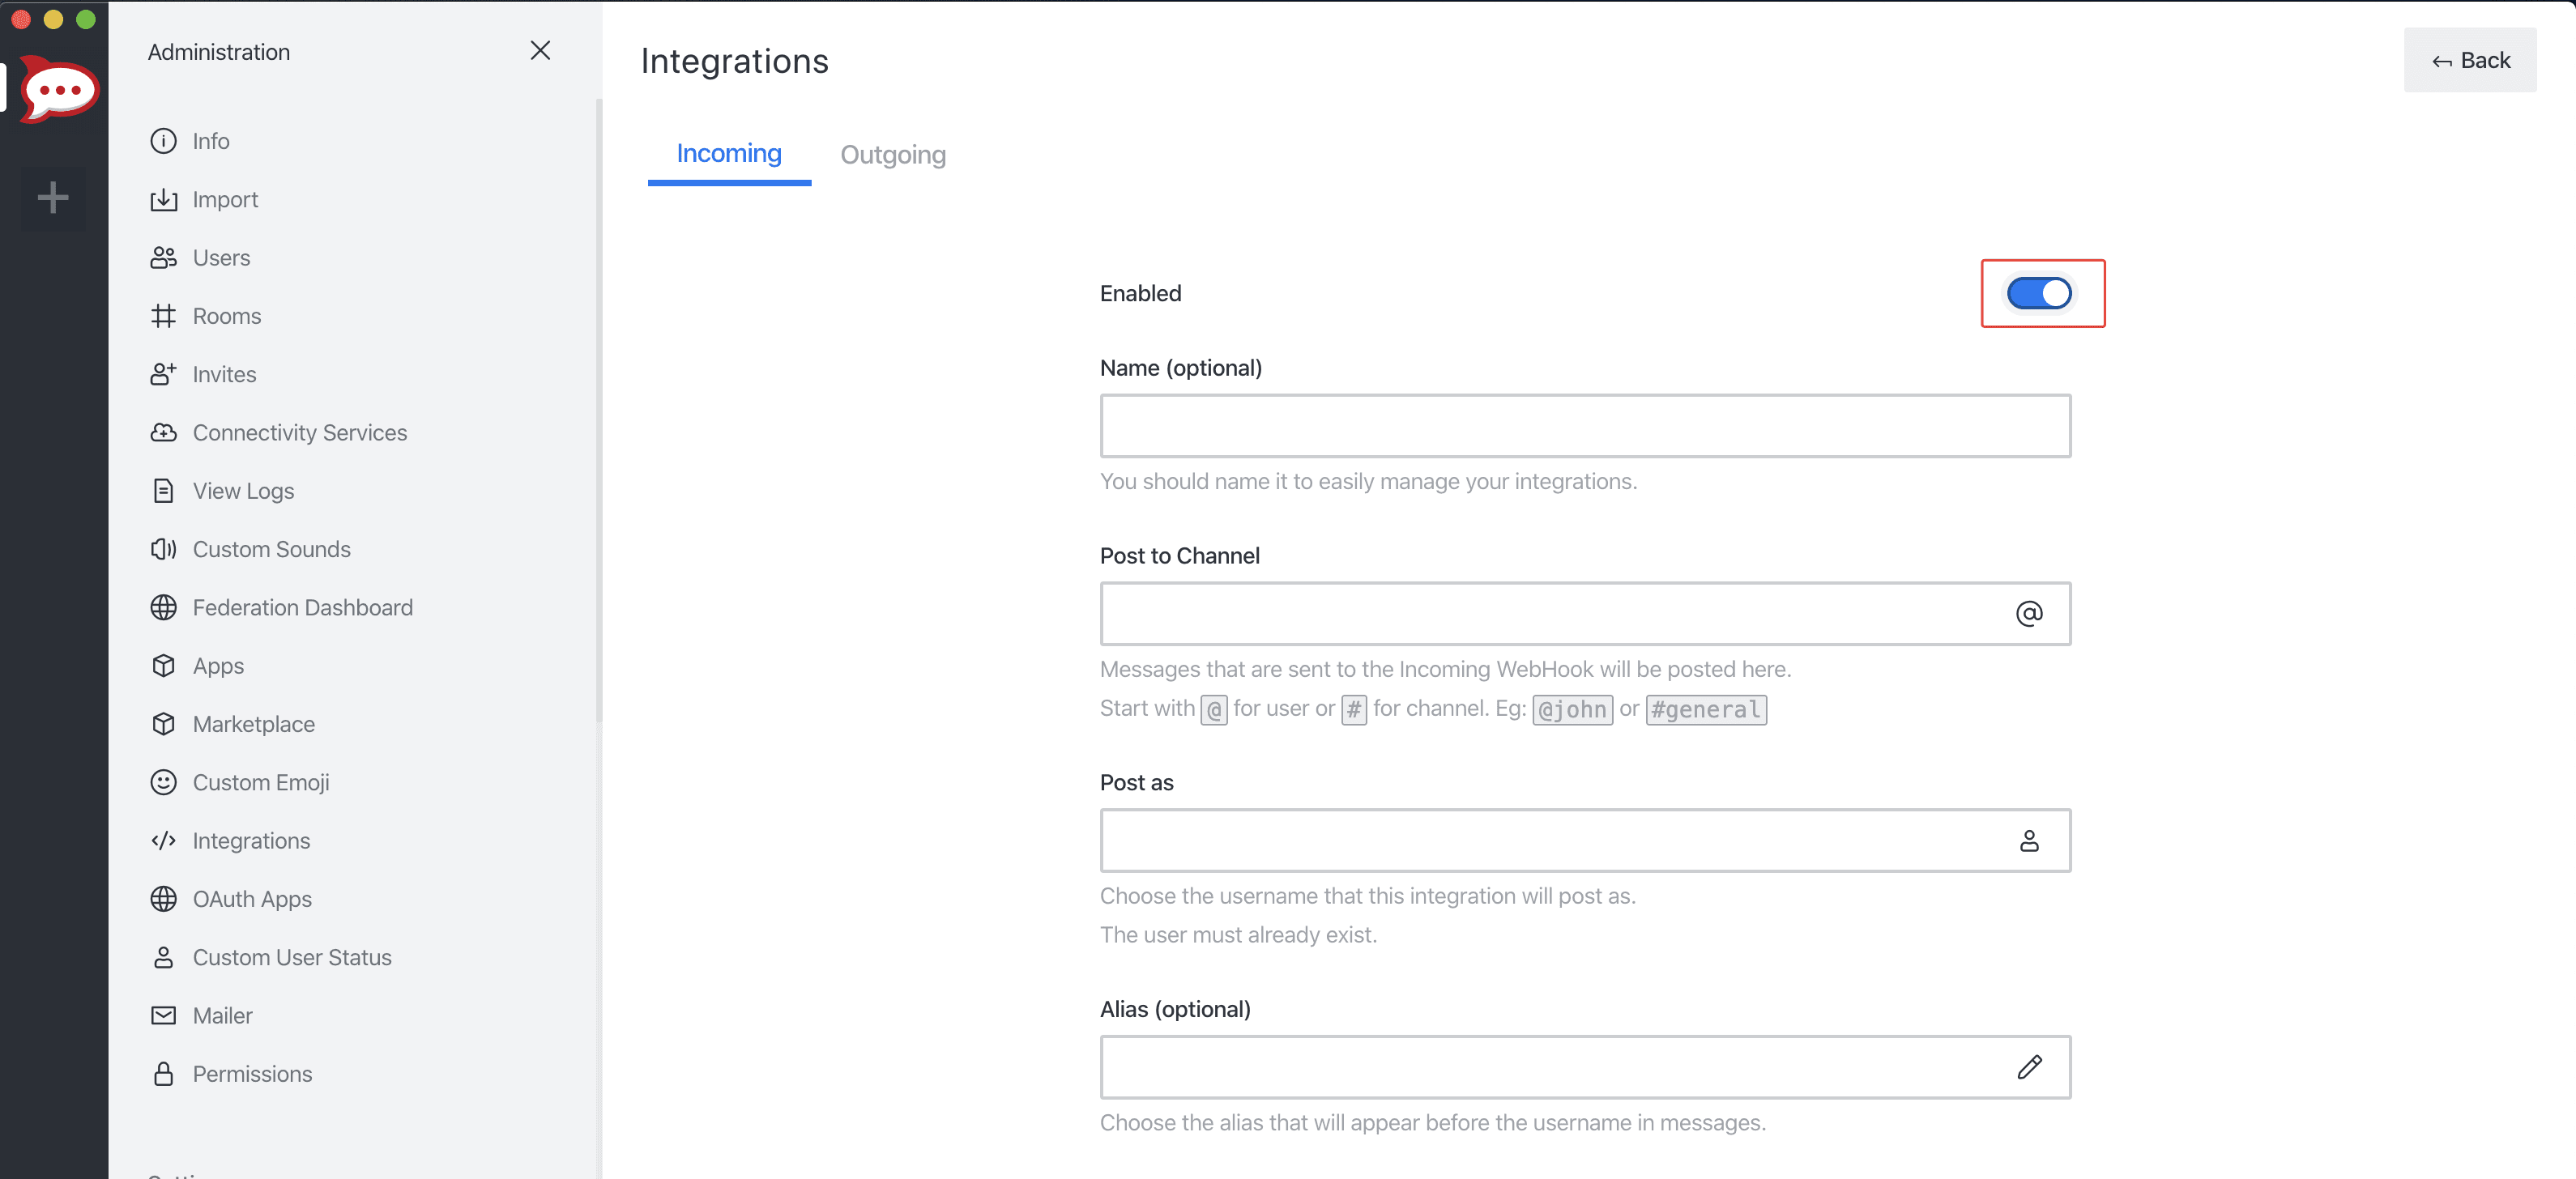
- Fill in the information for the webhook and click Save. Please don't forget to Enable your integration.
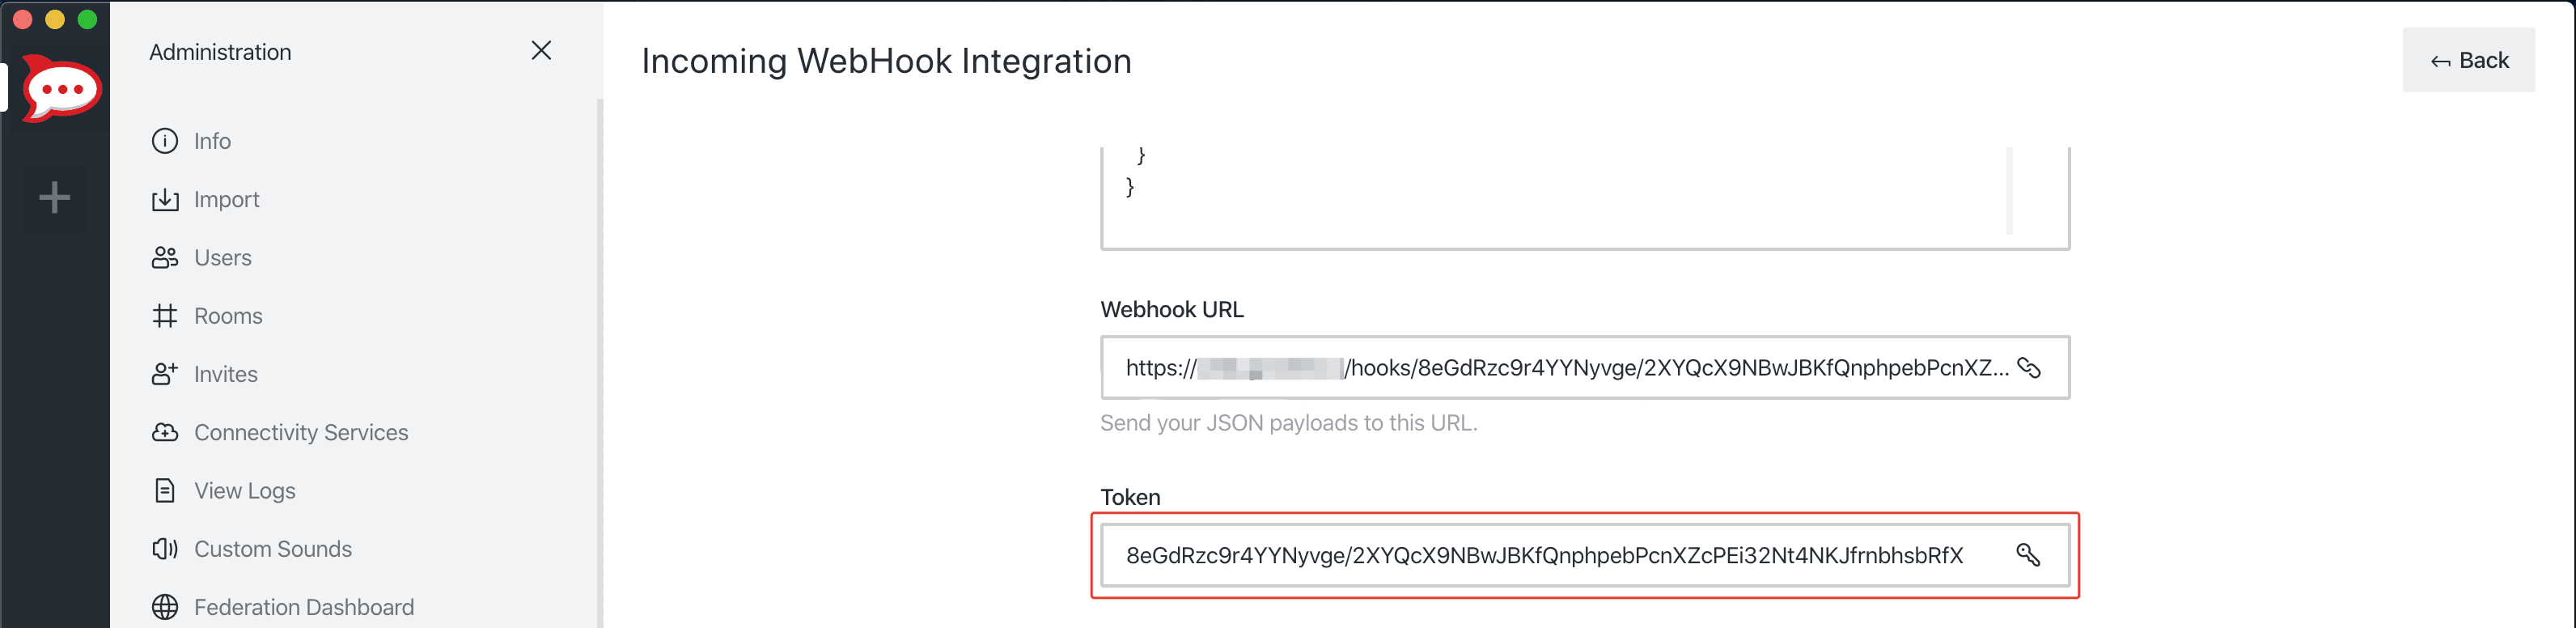
- If you did everything correctly, Rocket.chat will give you the URL and Token to your newly created webhook.
- Format the service URL
rocketchat://your-domain.com/8eGdRzc9r4YYNyvge/2XYQcX9NBwJBKfQnphpebPcnXZcPEi32Nt4NKJfrnbhsbRfX
                             └────────────────────────────────────────────────────────────────┘
                                                           token
Additional URL configuration
Rocket.chat provides functionality to post as another user or to another channel / user, compared to the webhook configuration.
To do this, you can add a sender and/or channel / receiver to the service URL.
rocketchat://[email protected]/8eGdRzc9r4YYNyvge/2XYQcX9NBwJBKfQnphpebPcnXZcPEi32Nt4NKJfrnbhsbRfX/shoutrrrChannel
             └──────────┘                 └────────────────────────────────────────────────────────────────┘ └─────────────┘
                sender                                                   token                                   channel

rocketchat://[email protected]/8eGdRzc9r4YYNyvge/2XYQcX9NBwJBKfQnphpebPcnXZcPEi32Nt4NKJfrnbhsbRfX/@shoutrrrReceiver
             └──────────┘                 └────────────────────────────────────────────────────────────────┘ └───────────────┘
                sender                                                   token                                    receiver
For more Rocket.chat webhooks options see official guide.